Adding Exercise Environments
Adding an Environment to Your Course
Note
When adding your desired exercise environment, we recommend selecting the most recent version of the environment to provide the best possible learning experience. While we make every effort to keep our courseware as current as possible, some courseware may instruct users to use an older version. The version of the environment can usually be found in its title (e.g., Cyber Basics (2022.11)).
-
To add an Exercise Environment, you should first navigate to your course in the Cyber Range. When you create your first course, your Exercise Area will be empty, as shown below.

-
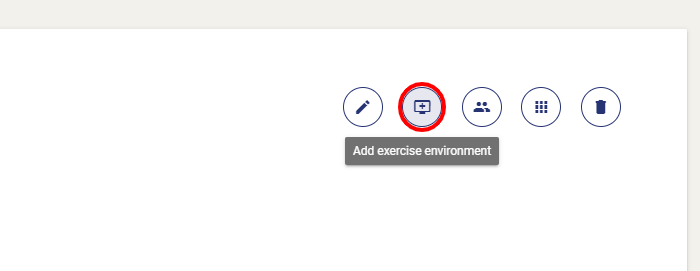
Once you have landed on your course page, select "Add Exercise Environment" to add an environment to your course.
-
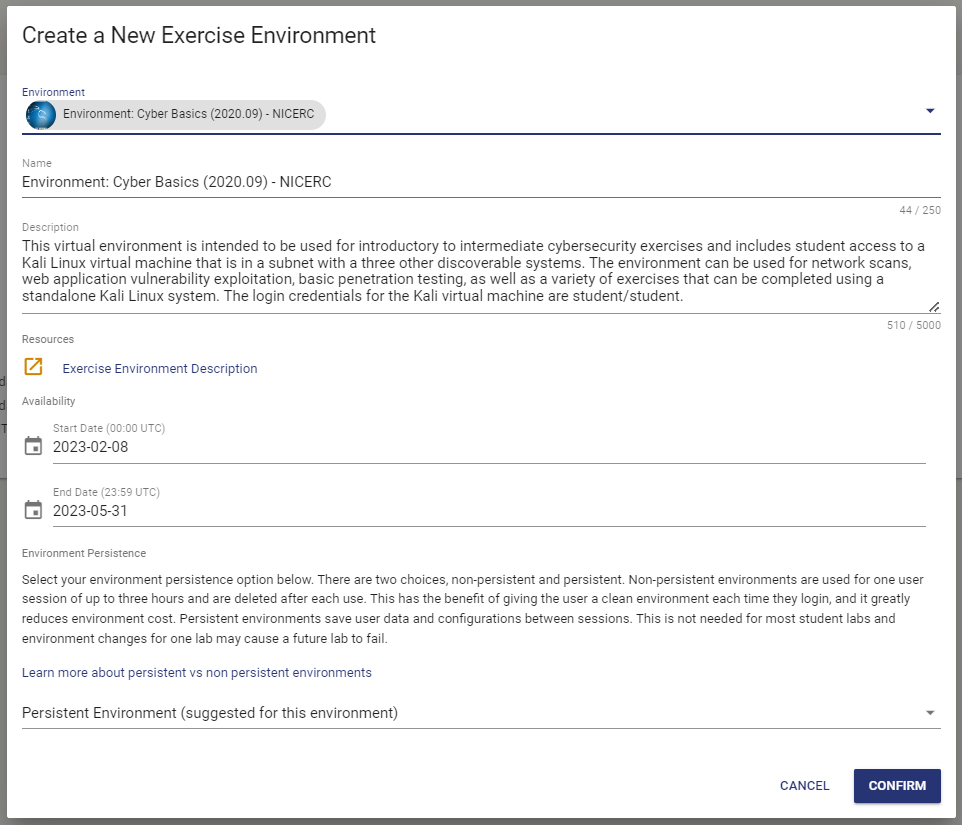
You will be shown a list of pre-built exercise environments. Choose one that is appropriate for your class.

-
Once you've selected your environment of choice, you will then be allowed to edit the title, description, and start and end times for the environment. Certain environments also have additional courseware and resources that goes along with the Virtual Machines. Under the "Resources" section, you can find additional content that will provide more information about the exercise and the courseware that goes along with it. The link will take you to the corresponding page in the Courseware Repository.
-
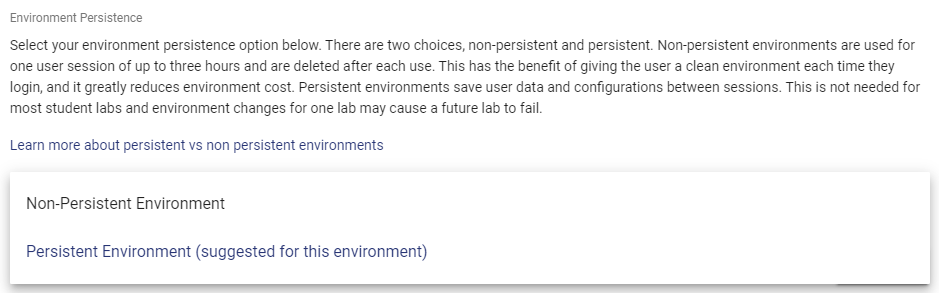
After editing your environment information, you will have the option of provisioning a persistent or a non-persistent environment. For more information on persistent and non-persistent environments, please refer to our article Persistent and Non-Persistent Exercise Environments.
Note
The session and persistence type can be found in the Details section of your provisioned Exercise Environment. Please refer to our article titled Persistent and Non-Persistent Exercise Environments for more information.
-
Once you have confirmed all details for your Environment, go ahead and create the environment by selecting "Confirm".

-
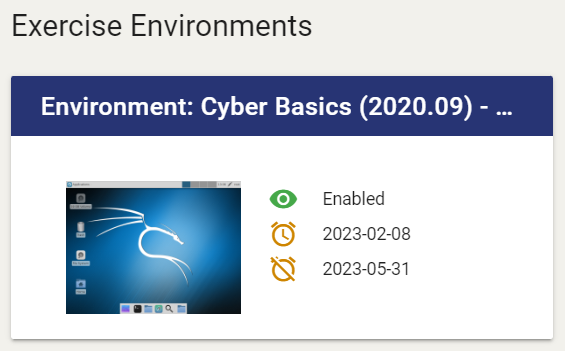
Once your new exercise has been created, it can be found in the Exercise Area of your course.
Warning
To ensure optimal use of Cyber Range resources, approximately 15 minutes after a user ends their session (for example, by closing the browser window that is displaying their exercise environment desktop) or after 6 hours of use, an exercise environment will save any progress made and automatically stop. If this happens during a user’s active session, they can simply restart the environment. This is designed to keep resources up-to-date while providing the best possible learning experience.
Exercise Environment End Dates
Setting an end date for your exercise environments can allow you to review the work students have done in the environments and grade them accordingly. Once the environment's end date has been met, students will not be able to establish any new connections to the environment and no additional changes can be made. However, instructors can still enter and access their students' environments to evaluate their work.
The exercise environment end date can be adjusted by editing the exercise environment's dates of availability. Please refer to How Do You Change an Exercise Environment Availability Date? for more information.
Note
Keep in mind that live connections to VMs will not be terminated when the end date is met (e.g. if a student is still actively working in their environment). If you wish to set a deadline at a specific time, the VMs will need to be stopped manually by the instructor.
Have a Question? Contact Support
We're here to help you. If you still have questions after reviewing the information above, please feel free to submit a ticket with our Support Team and we'll get back to you as soon as possible.
Thank You for Your Feedback!