Editing Admin Permissions
Abstract
As an Organization Admin, you can decide which permissions your users are assigned in your organization. This article will guide you through the process of editing user roles. If you wish to have your permissions changed, please reach out to your Organization Admin.
How to Edit User Permissions
Important
If you are unsure of the differences between admin permissions, please refer to the article titled Administrator Features and Permissions Comparison
-
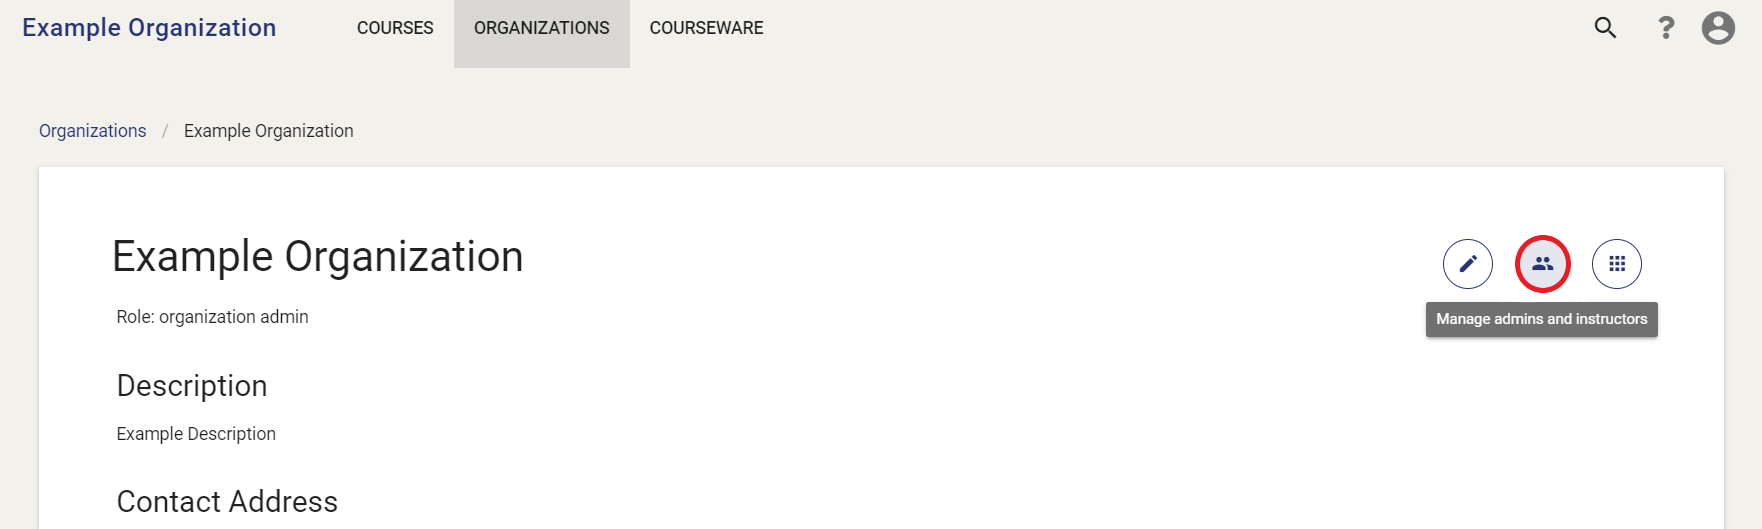
First, begin by navigating to your organization. Click on the Manage Users button located in the top right of your organization page.
-
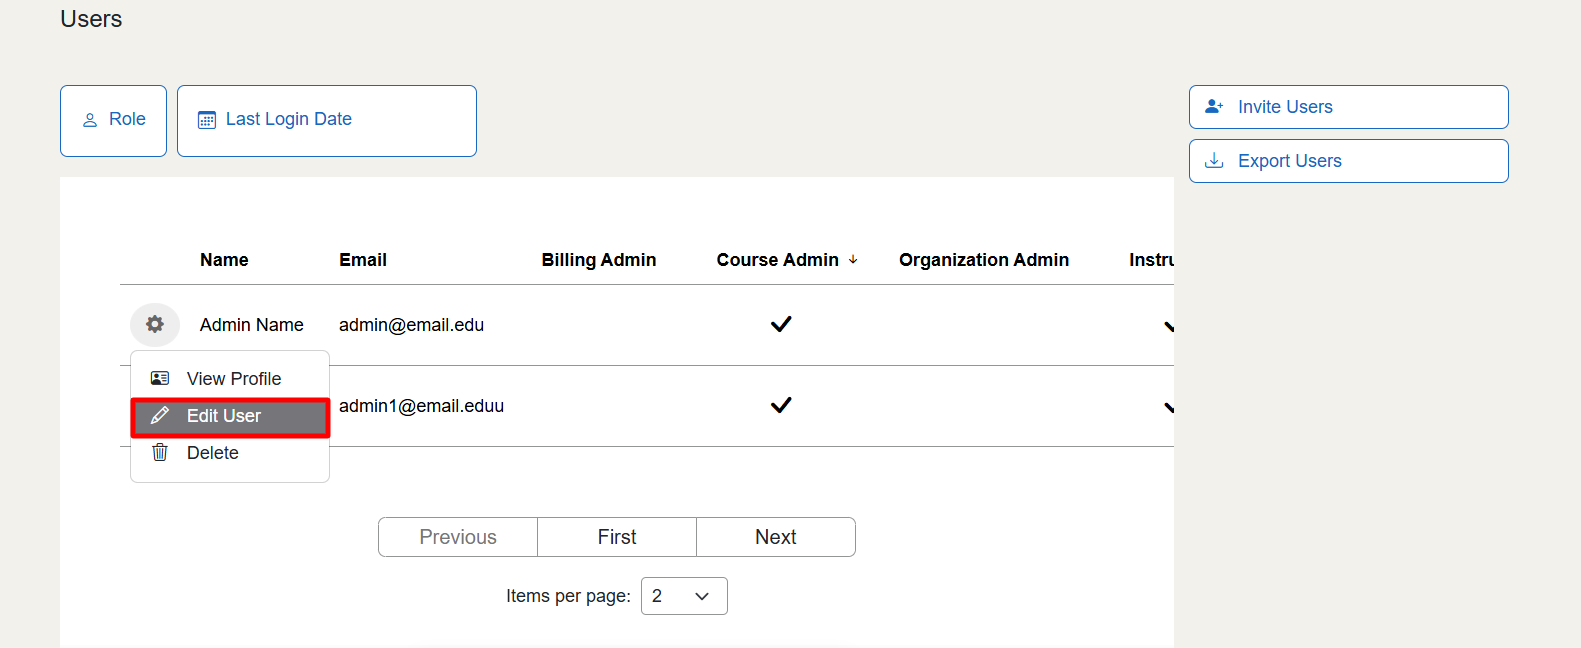
You will then be directed to the Organization Users page. This page lists all current users in your organization, including admins. To edit a user's permissions, simply click on the cog wheel located to the left of their display name and select the Edit User option.
-
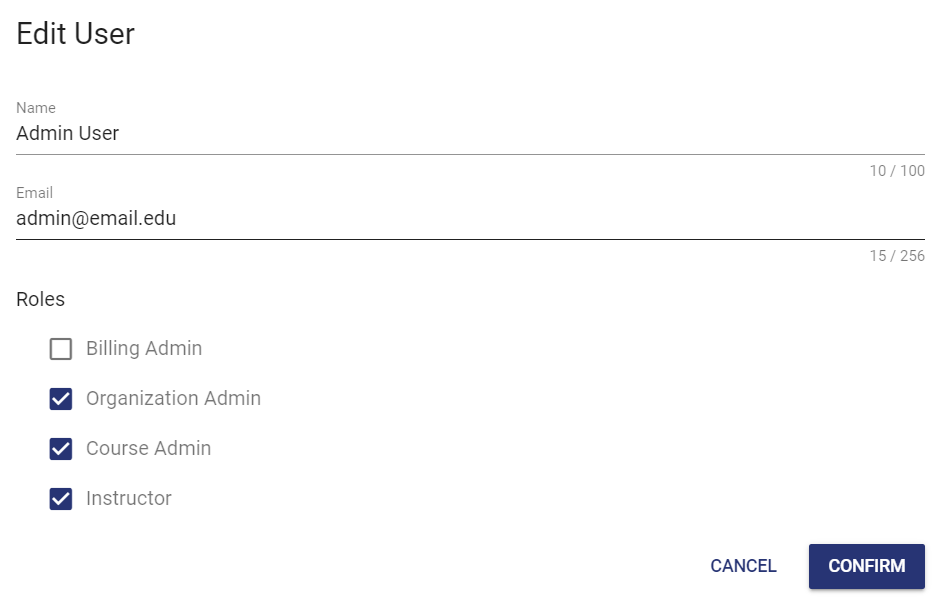
You will now have the option to edit their permissions. To do so, you can check or uncheck roles under the Roles section of the form. Click on the Confirm button once complete.
Have a Question? Contact Support
We're here to help you. If you still have questions after reviewing the information above, please feel free to submit a ticket with our Support Team and we'll get back to you as soon as possible.
Thank You for Your Feedback!