How to Create a Course - For Course Admins
Abstract
This article will walk you through the steps needed to create a course in the U.S. Cyber Range as a course admin. Please keep in mind that course admins have the ability to create courses directly and do not need to submit course requests in order to create a course.
If you would like to learn about how you can approve courses requested by instructors in the exercise area as a Cyber Range course admin, please refer to the article titled Course Approval.
Create a Course
-
Navigate to the U.S. Cyber Range
Please login to the U.S. Cyber Range and navigate to the Exercise Area under "Courses" on the far top left side. For more information on logging in, please refer to the article titled How to Login to the Cyber Range.

Once you're logged in, look for the "+ Create a Course" icon to start the process of requesting the creation of a new course.

-
Enter Course Details
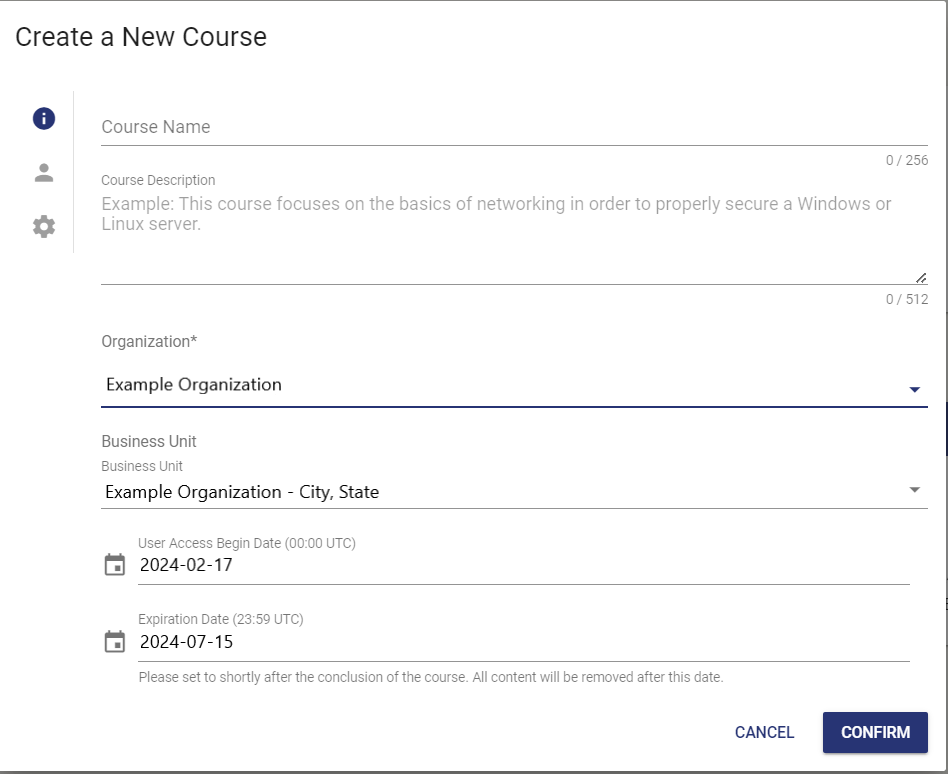
Next, fill out all the fields in the pop-up box shown below. Your students will be able to view the course name and description once they've successfully enrolled in the course. Please set the course's expiration date to shortly after the conclusion of the course; your organization will continue to be charged until the course expires.

-
Select an Instructor
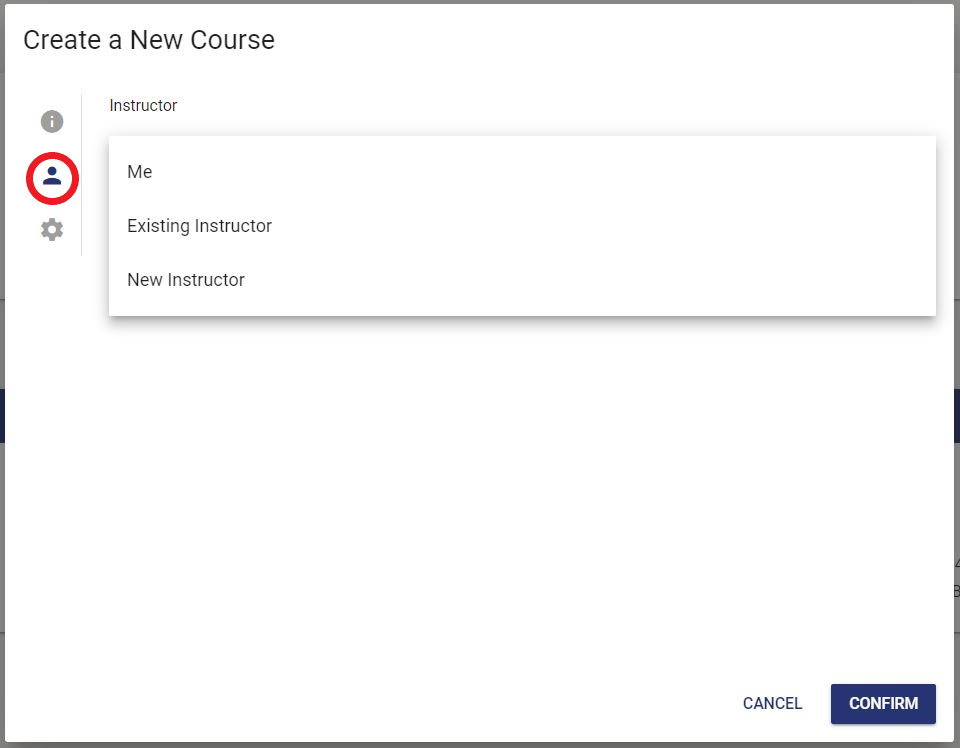
Click on the instructor icon to set an instructor for the course. You may set yourself as the instructor, select an existing instructor, or invite a new instructor to the course.

Note
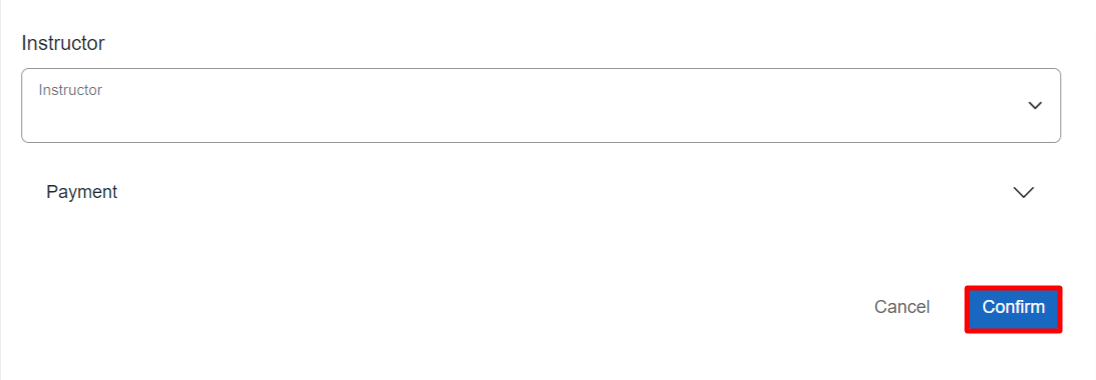
If you'd like for users to pay for the course, simply check the box next to "User Direct Pay" under "Payments".
-
Click on the "Confirm" button
Once you've verified all the course details are correct, you can click on the "Confirm" button to create the course.

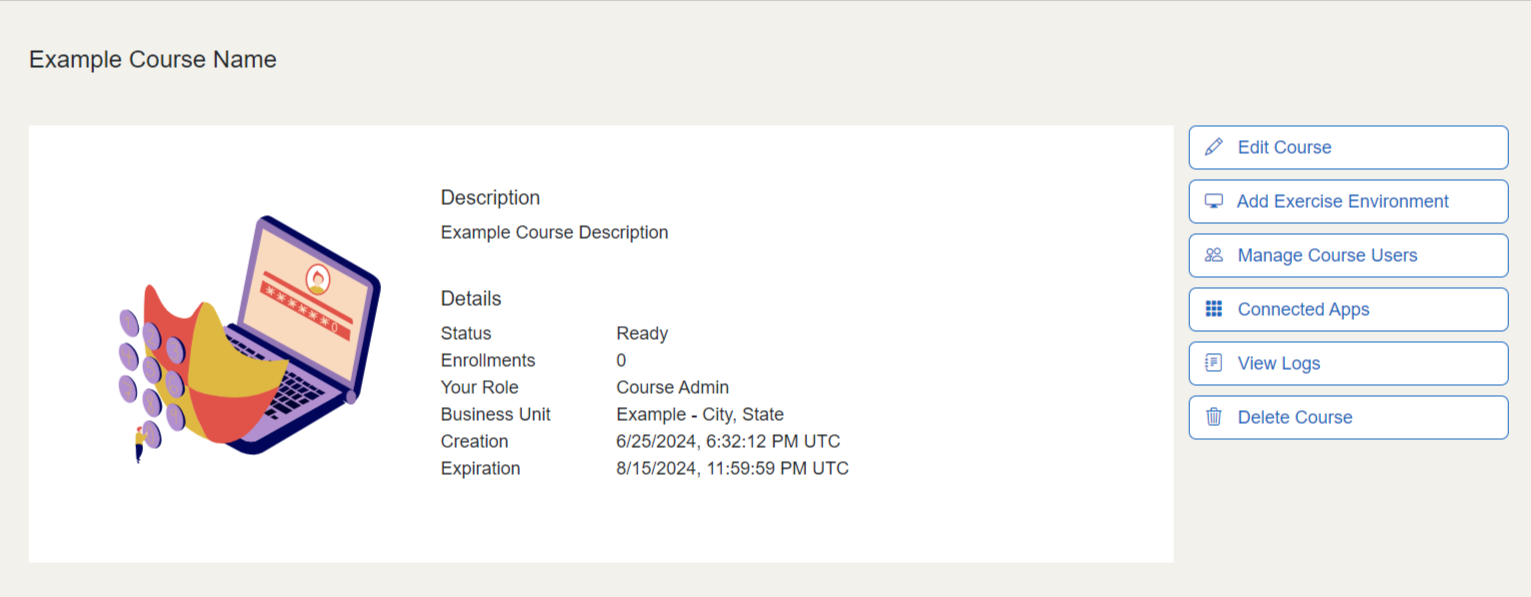
You should now be able to access your course and course information from your exercise area homepage.

Default Course Expiration Dates
To reduce your costs we strongly recommend you set course expiration dates. Once your course expires, all enrollments and environments are deleted and no further costs are incurred by your organization. Below are the default end dates for courses based on when the course is created:
| Course Created In | Default End Date |
|---|---|
| January | May 15th |
| February | May 15th |
| March | May 15th |
| April | May 15th |
| May | Aug 15th |
| June | Aug 15th |
| July | Aug 15th |
| August | Dec 15th |
| September | Dec 15th |
| October | Dec 15th |
| November | Dec 15th |
| December 1st - 14th | Dec 15th |
| December 15th - 31st | May 15th of next year |
Important
While you can extend a course beyond the default end date, you cannot extend a course past your organization's plan end date. If you are unsure of your organization's plan end date, please contact your organization admin. Please refer to How Do You Change a Course Expiration Date? for more information.
Have a Question? Contact Support
We're here to help you. If you still have questions after reviewing the information above, please feel free to submit a ticket with our Support Team and we'll get back to you as soon as possible.
Thank You for Your Feedback!