Cyber Range Pool Model
Abstract
This article will explain the concept of our Pool Model and cover how to set the reserved number of enrollments for your course.
What Is the Pool Model?
At the U.S. Cyber Range, we are committed to providing a seamless experience when using exercise environments. To minimize wait times, we introduced the pool model, which ensures faster access to the exercise environments. Typically, a brand-new exercise environment can take several minutes to fully initialize. The Pool Model addresses this by pre-warming environments, allowing users to access them in under a minute on subsequent start-ups.
How Does the Pool Model Work?
The Pool Model utilizes a separate pool of pre-warmed environments for each individual exercise environment. The number of exercise environments in the pool will scale dynamically daily based on how many users are expected to need them.
It is particularly beneficial for larger classes that use invitation codes for registration. The system adjusts the pool size based on the Reserved Enrollments value set by the instructor when creating a course invitation code. By configuring reserved enrollments when creating a course code, you can ensure that there will be enough pre-warmed exercise environments for your students with minimal delay.
Reserved Enrollments
To ensure all course users can use their exercise environments without extended delay on first use, instructors should properly set the number of reserved enrollments. This value can be set after creating a course invitation code and then by editing the reserved enrollments value.
For example, if you expect to have 50 users in your course, you should set the reserved enrollments value to 50. Next, you'd deploy an environment like Cyber Basics. This would indicate to our system that 50 Cyber Basics environments are needed and it would begin preparing them for use.
Setting Reserved Enrollments
Reserved Enrollments can only be set after creating a course invitation code.
Warning
Please ensure that the Reserved Enrollments are set as close as possible to the approximate number of users you plan to have in the course. Overestimating the number of users can waste cloud resources and potentially incur a higher invoice for users under the Flex Rate Plan.
Create an Invitation Code
Important
Invitation codes are valid for twenty-one (21) days. Please create a new invitation code if your invitation code expires.
-
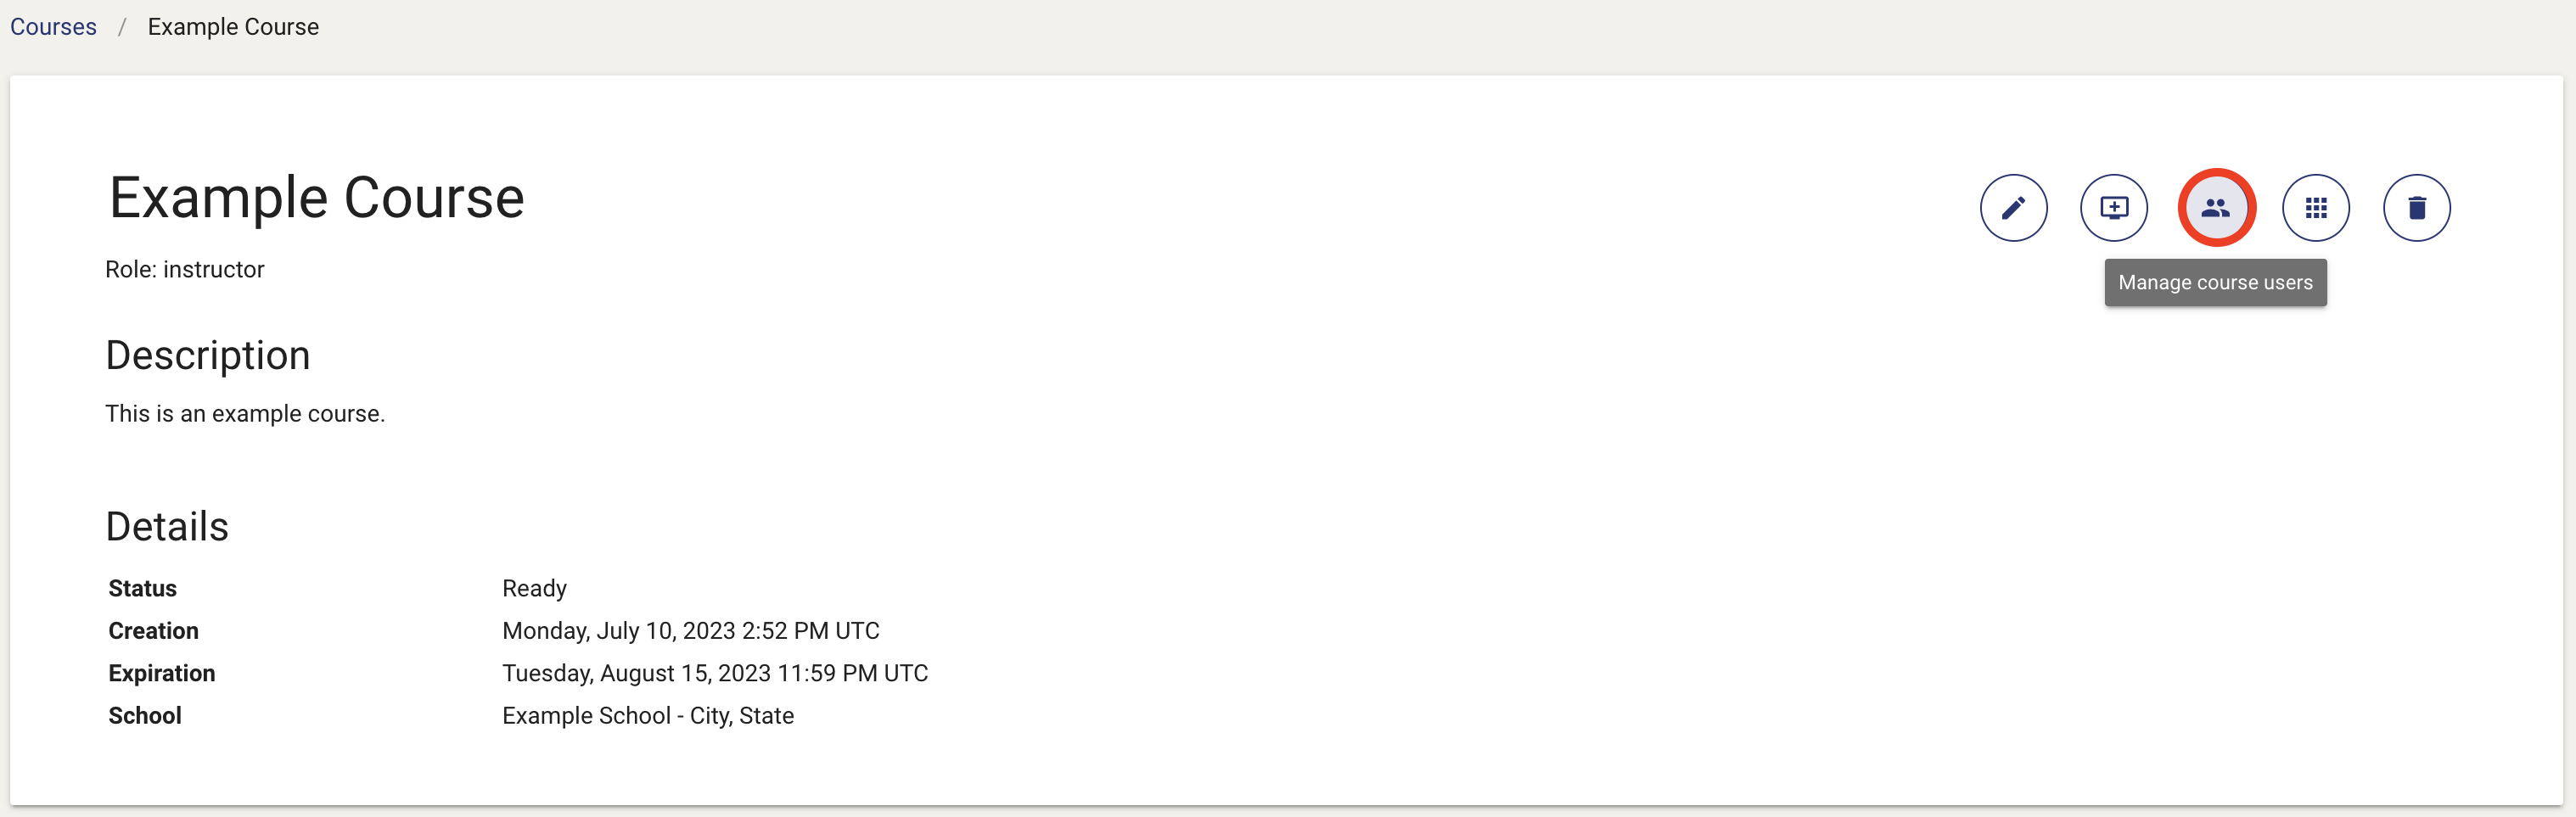
Select your course in the Exercise Area and click on the Manage Course Users button to navigate to the Users page.
-
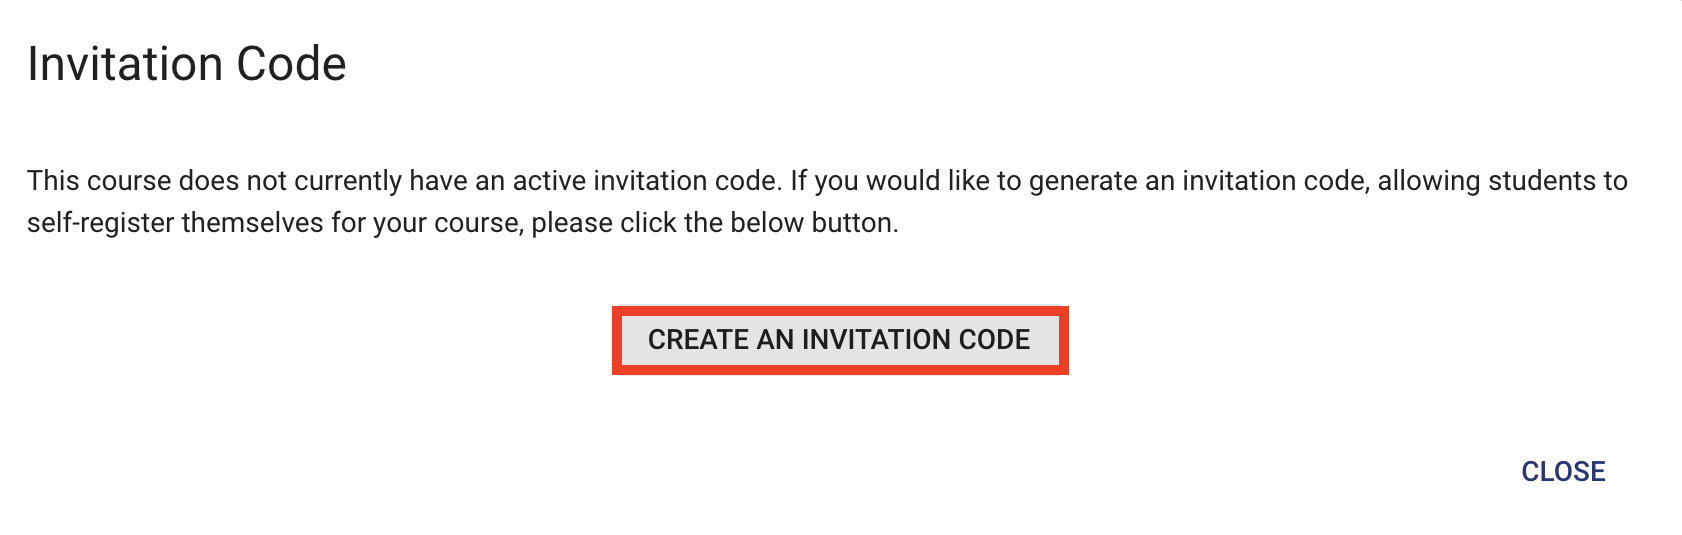
On the Users page, click on the Invitation Code button.

-
You will then be directed to the Invitation Code page where you can select the Create Invitation Code button.
-
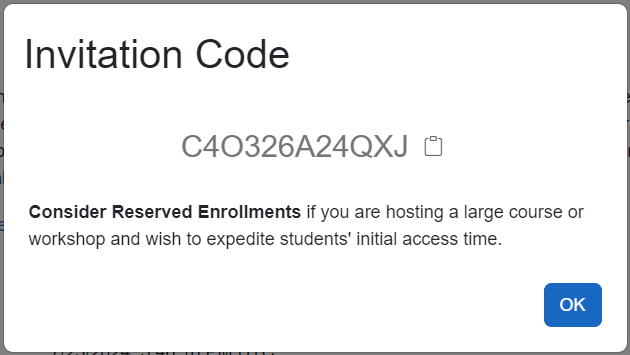
A window containing the invitation code will appear allowing you to copy the code to your clipboard. Click the OK button to exit the window.
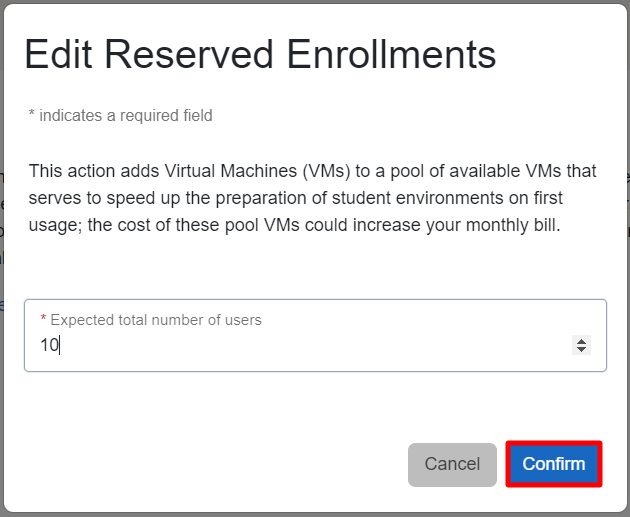
Edit Reserved Enrollments
-
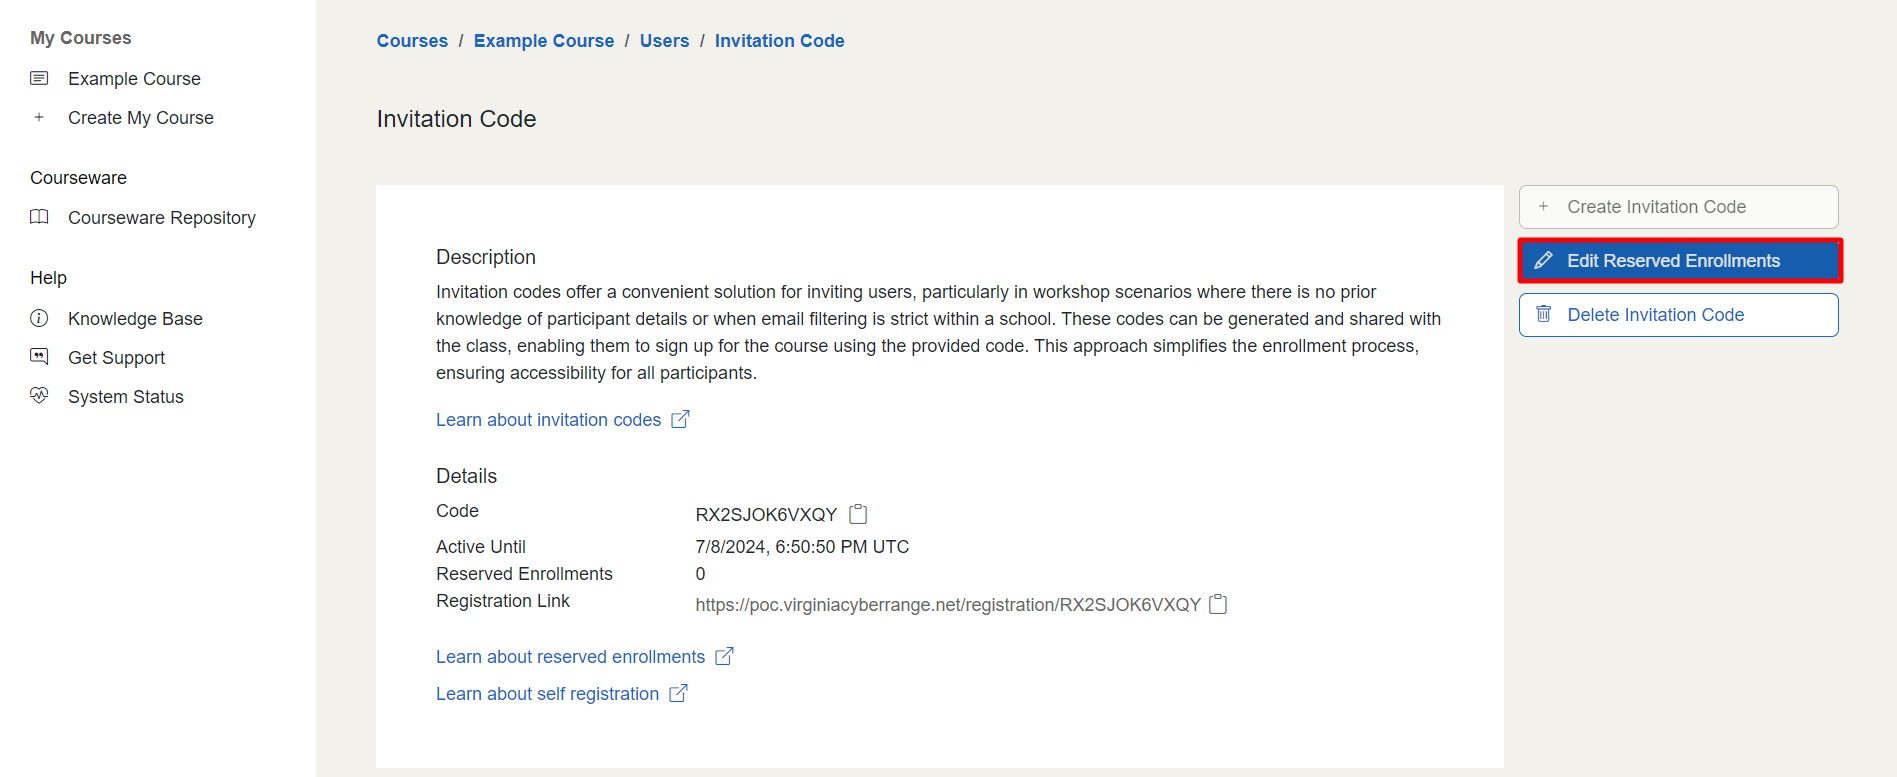
Once you’ve created an invitation code, you can edit the number of reserved enrollments on the Invitation Code page. Click on the Edit Reserved Enrollments button.
-
Once the window appears, enter the expected total number of users and then select the Confirm button.
Note
You can update this value at any time.
What if I Didn’t Set the Reserved Enrollments?
If you are working with a larger class and haven't reserved any enrollments, we recommend starting all students' exercise environments at least ten minutes before they need to be used for the first time.
You can individually start exercise environments by using the power button next to your students' exercises to begin the warming process. A number of exercise environments will be pulled from the pool permitting them to start very quickly, while others may require several minutes.
You can also start all environments at once by using the "start all exercises" feature. You can find more information about that feature in our Start All Exercises Feature article.
Have a Question? Contact Support
We're here to help you. If you still have questions after reviewing the information above, please feel free to submit a ticket with our Support Team and we'll get back to you as soon as possible.
Thank You for Your Feedback!